Install and upgrade
On this page:
Requirements
All you need is a Linux server with these tools installed:
- docker
- docker-compose
- curl
Docker version 19.03.8, build afacb8b7f0
~/$ docker-compose -v
docker-compose version 1.24.0, build 0aa59064
~/$ curl --version
curl 7.70.0 (x86_64-pc-linux-gnu) ...
Release-Date: 2020-04-29
Protocols: ...
Features: ...
Hardware requirement is minimal: 128MB of RAM and 1 core will suffice, provided you’re not doing intensive video transcoding and/or serving thousands of users simultaneously.
Installation
The official Docker image is available on Docker Hub
~/filestash$ curl -O https://downloads.filestash.app/latest/docker-compose.yml
% Total % Received % Xferd Average Speed Time Time Time Current
Dload Upload Total Spent Left Speed
100 322 100 322 0 0 98 0 0:00:03 0:00:03 --:--:-- 98
~/filestash$ docker-compose up -d
Creating filestash_app ...
Creating filestash_app ... done
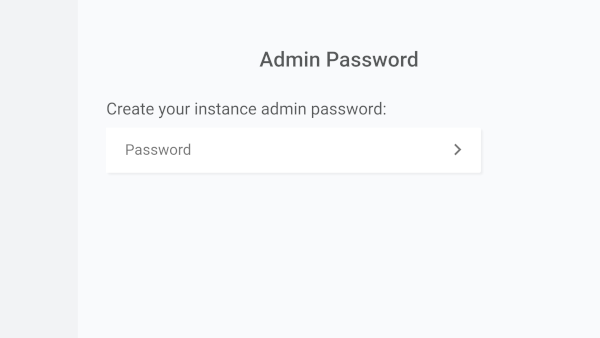
After installation, navigate to http://your_domain:8334 to configure your admin password:
Configuration
For a basic setup, simply choose the storage backends you need, and you’re all set:
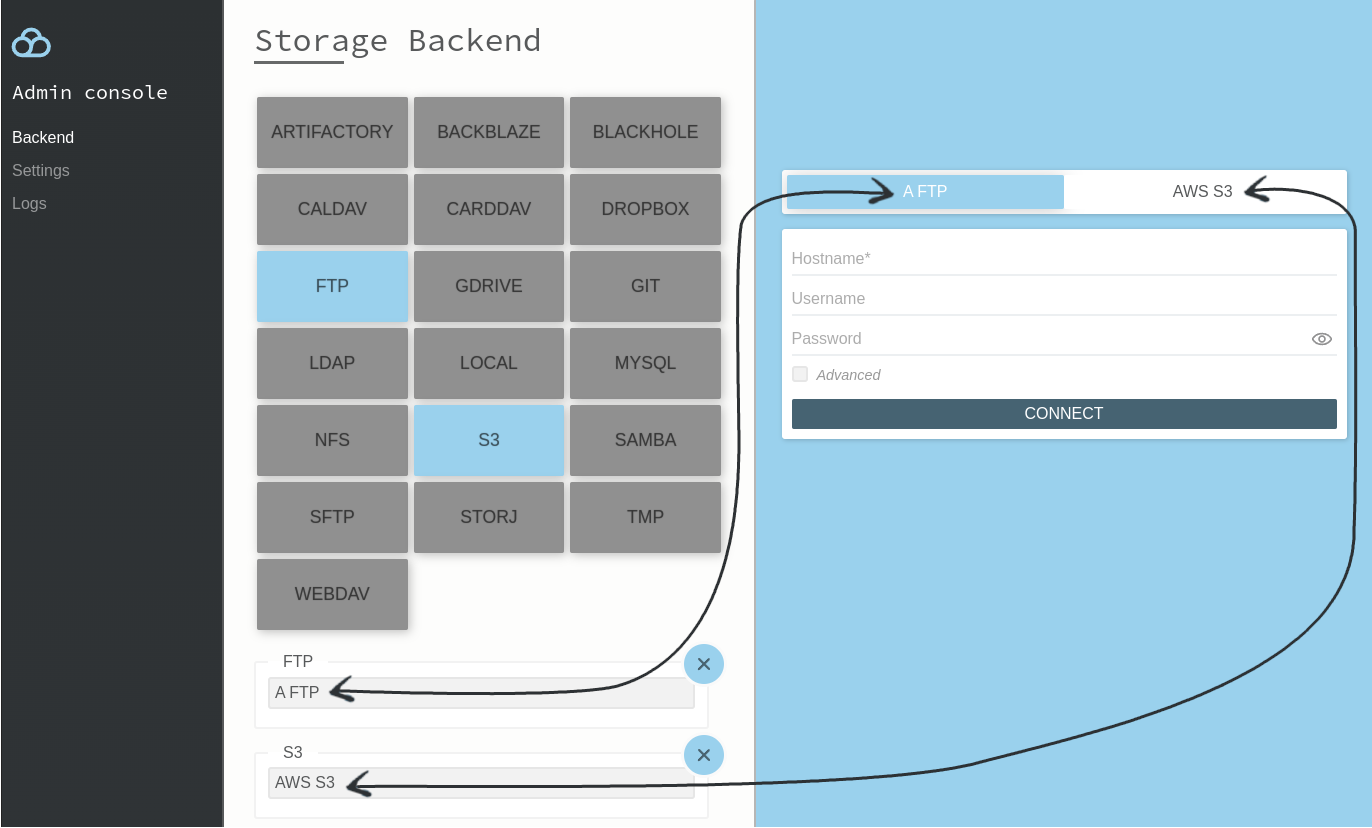
This is the setup we use for the publicly available demo. If that’s all you need, you can jump straight to going to prod, as everything that follows is totally optional and involves the more advanced stuff of delegating authentication and authorisation.
Advanced Authentication Methods
Now that we’ve covered the basics, let’s dive into the cool stuff, connecting your storage to different authentication sources. There are plenty of valid strategies, but they all fall into one of two buckets:
- the passthrough pattern
- the facade pattern
Advanced Authentication - Passthrough Pattern
It is the right choice for you if:
you prefer the authentication to be handled by the storage layer, meaning the authentication details are passed directly to the storage.
What does that look like in practice?
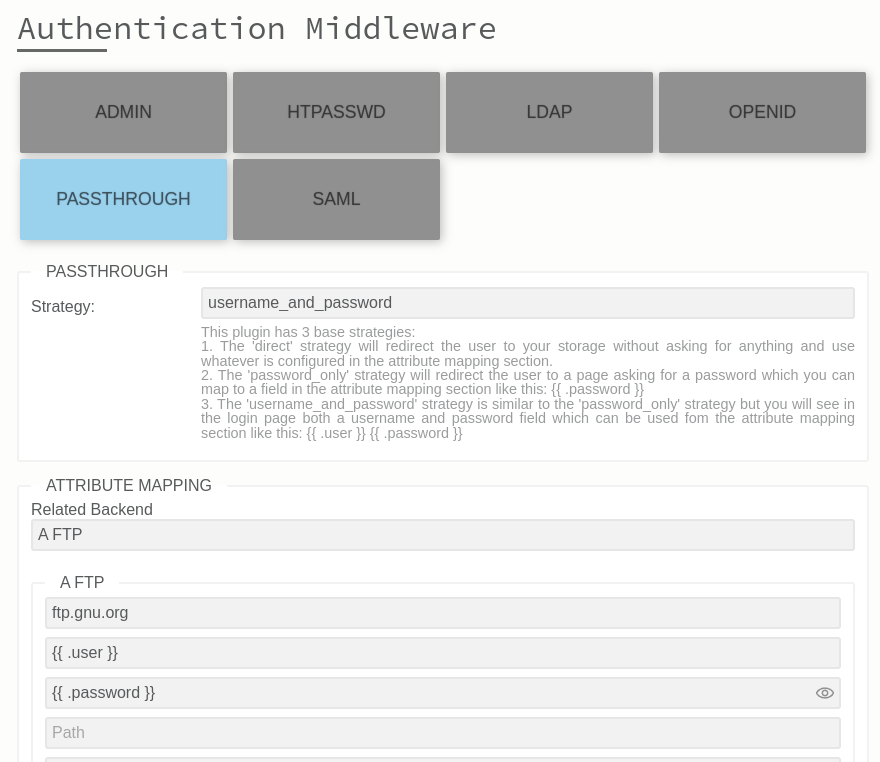
Using this configuration, users will see a much simpler login page:
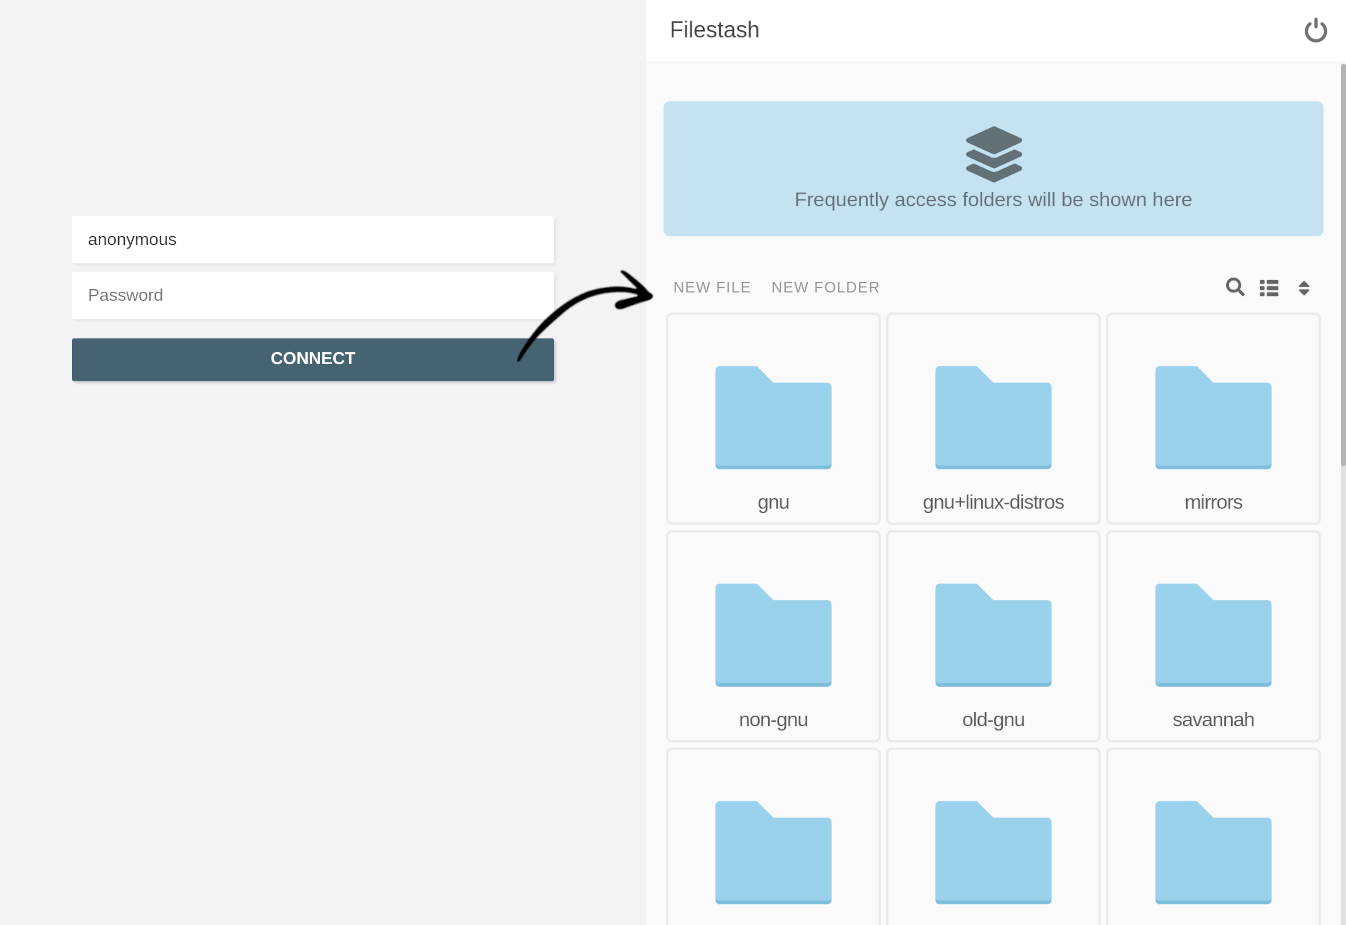
At this point, the user experience is much improved over our starting point, as users no longer need to remember details like the “hostname” and “port”. The connection combines static values, like the hardcoded “ftp.gnu.org” hostname from the admin configuration, with dynamic variables such as the “username” and “password” provided by the user.
Another common strategy is to create automatic login links. To set this up, simply change the strategy in the configuration to “direct” and configure everything statically.
Filestash has 3 plugins that support the passthrough pattern:
- the “Passthrough” middleware plugin, showcased in this section
- the “URL” middleware plugin*, which exposes URL parameters as dynamic variables in the configuration, and supporting signed URLs as an option. It’s ideal for generating secure deep links and QR codes.
- the “Proxy” middleware plugin*, which is if you have a proxy sitting in between and forwarding headers like
X-Remote-UserorX-Remote-Groupheader.
Advanced Authentication - Facade Pattern
It is the right choice for you if:
You prefer users to authenticate through a separate system, with options to grant various type of access based on their identity.
This approach creates a “facade”, forcing users to authenticate through one of the following methods:
- The Apache style htpasswd file
- The Local Auth plugin to authenticate user locally with a nice management GUI if you think htpasswd is too “rough” and/or need to associated roles to local users.
- Enterprise SSO plugins: OpenID, SAML, LDAP*
- An external HTTP service*
Using the Apache style authentication middleware, it looks like this:
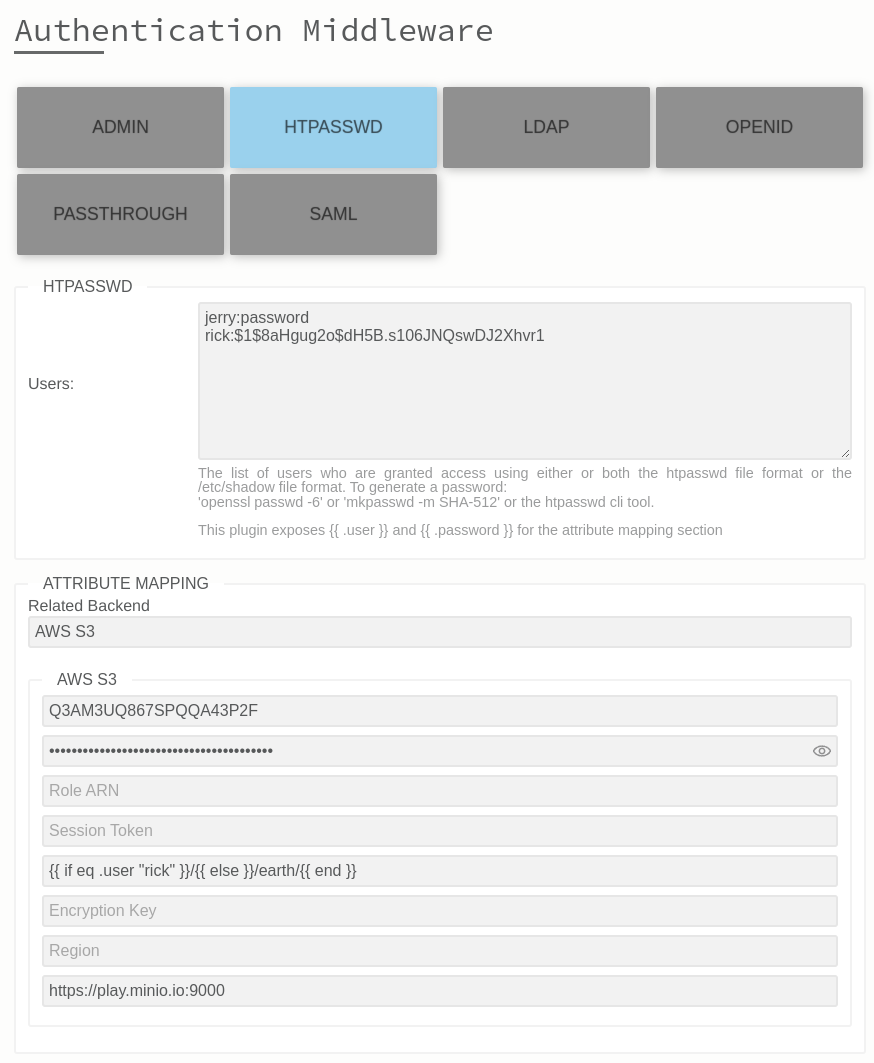
In this setup, we have 2 valid users, each with their own username and password. The path variable is dynamically generated based on the authenticated user. Concretely, this means the user “rick” has full access to all S3 buckets, while “jerry” is restricted to the “earth” bucket only.
Under the hood, these mappings are handled using the Go templating language, enhanced with custom functions to support more advanced use cases. For example, you can dynamically generate chroot paths based on AD groups by building queries like this: {{ if .memberOf | contains “ADMIN”}}/{{ else }}/{{ .department }}/{{ end }}
Authorisation
The enterprise build allows you to define and restrict the actions users are allowed to perform:
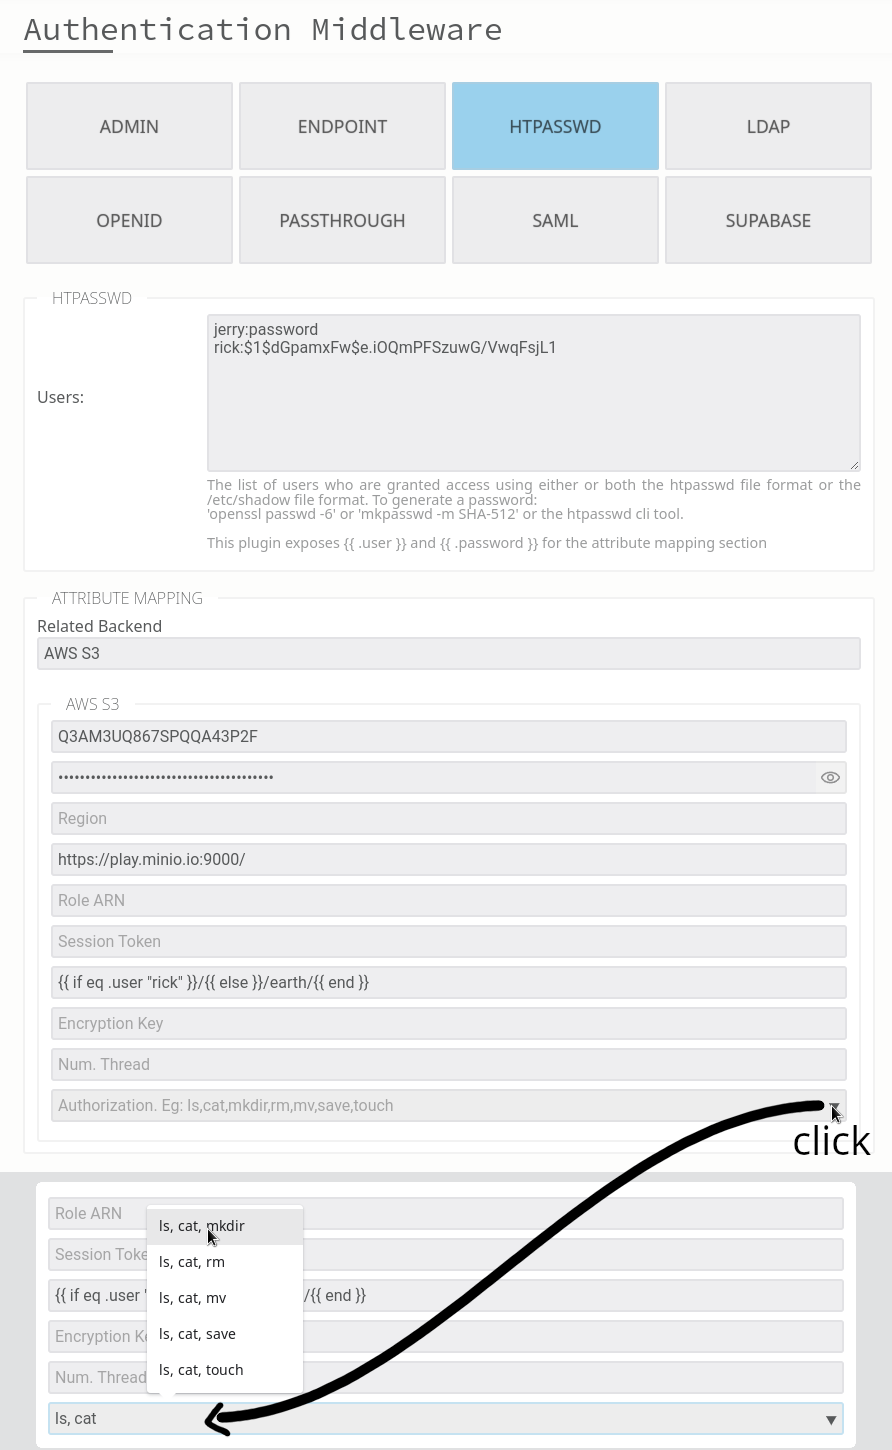
In this example, we enforce read only access to our storage. This effectively blocks users from creating new files or folders, uploading content, moving items, or deleting anything.
Similarly to what we did earlier, you can create rules based on any attribute returned by your IDP:
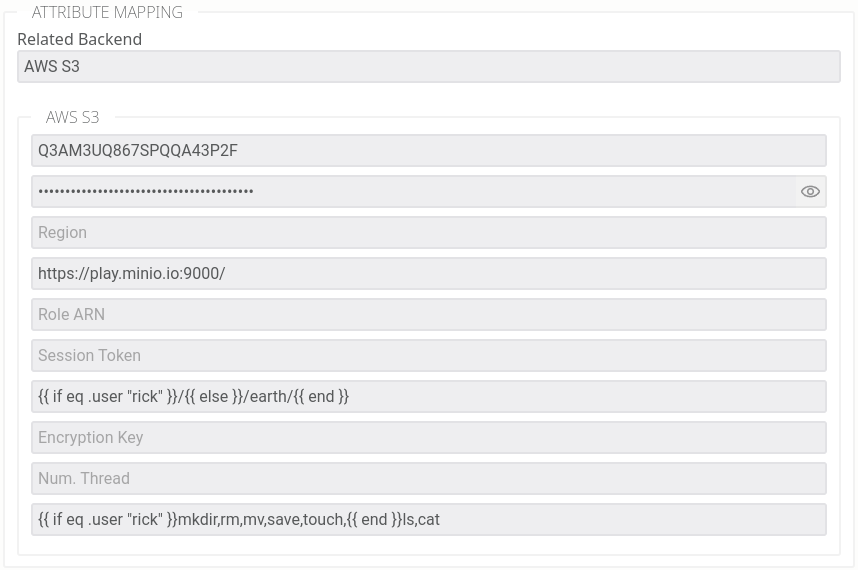
In this example, rick is allowed to perform all actions everywhere, while everyone else is limited to read only access, meaning they can list files within the “earth” bucket and download its contents.
If your project’s authorization requirements exceed the capabilities of the Go template mechanics, a custom “authorization plugin” is the way forward. An “authorization plugin” is a Filestash plugin implementing this interface.
To give a concrete example, one of our customers is this property management firm. Each property they manage is represented as a folder in their filesystem, with users assigned roles for each property, either as a “homeowner”, “board member”, “committee member”, “manager”, or “staff”. These roles grant users different access levels. For example, “homeowners” cannot view the accounting folder, “committee members” have read-only access to committee reports, and “board members” have write access to those reports. Only “managers” can delete files, while “staff” act as company administrators with full access across the entire portfolio of properties. For this highly customized use case, we implemented all their access control needs via an “authorization plugin”. Within a week of the initial call, they had a fully functional turnkey solution.
Plugins
So far, we’ve touched the 3 pillars of a solid bespoke solution:
To see all the plugins installed in your instance, visit the /about page:
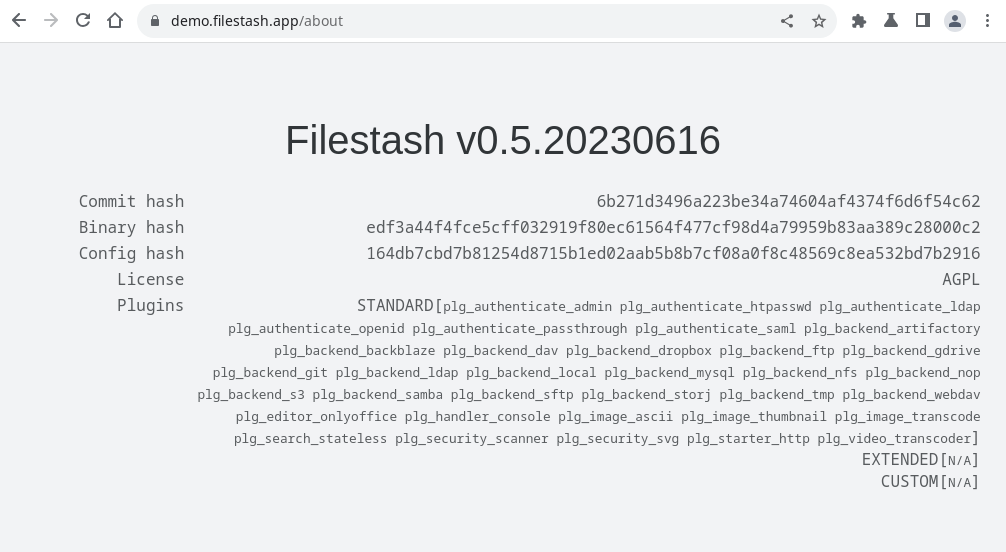
Each plugin controls a specific aspect of how the software behaves. Fundamentally, Filestash is built as a framework for developing file management applications, and plugins are the lego blocks that enable customization of almost everything. For a in depth rundown of all the off the shelve plugins, visit the dedicated plugin page
Going to Prod
Enabling TLS
To deploy the base build in production, you will need a reverse proxy fronting the traffic and performing SSL termination there. That’s the setup powering the online demo, with nginx configured like this.
Customers have more flexibility in handling HTTPS, with additional options to expose Filestash as a native HTTPS service by either:
- loading your existing certificates directly into Filestash
- letting Filestash provision certificates at runtime via ACME and Let’s Encrypt. This method is “set and forget”, with no human intervention needed to renew certificates, no third party software, and no extra setup.
All those methods are documented here.
Mailing List
If you want to be in the loop about Filestash’s ongoing development, new releases and security updates, you might want to join the mailing list:
Enterprise Setup
Filestash is deployed in many sensitive environments with very stringent needs. If this sounds like what you are doing, you might want to read:
-
our hardening guide
-
some actual use cases we’ve worked on
-
some examples of architecture diagram that was made for a deployment in large pharma with requirements for high availability and scalability. You can read about that in this post from the AWS Blog:
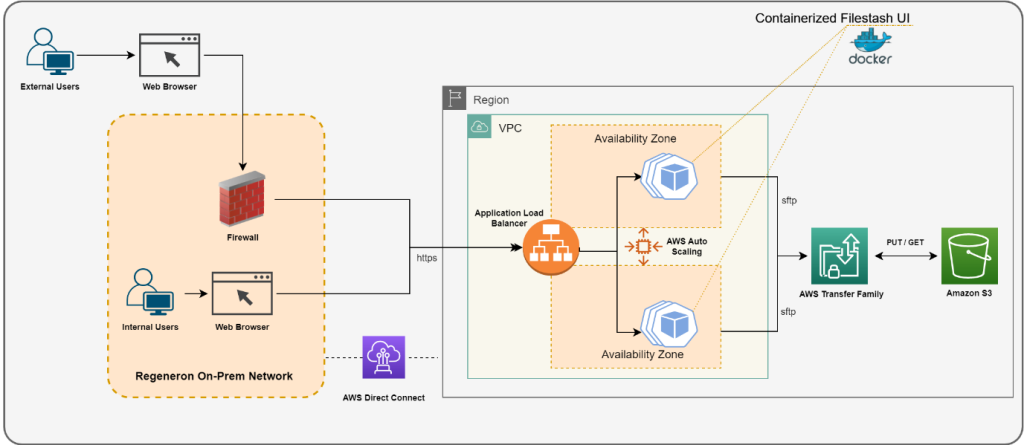
Source: How Regeneron built a secure and scalable file transfer service using AWS Transfer Family
Upgrade
To update Filestash:
% Total % Received % Xferd Average Speed Time Time Time Current
Dload Upload Total Spent Left Speed
100 322 100 322 0 0 98 0 0:00:03 0:00:03 --:--:-- 98
~/filestash$ docker-compose pull
Pulling app (machines/filestash:latest)...
latest: Pulling from machines/filestash
Digest: sha256:4da068a5868d736f6382618e6f8baa6cf44c1cf0f94a3ded05aa25b00a41f425
Status: Image is up to date for machines/filestash:latest
~/filestash$ docker-compose up -d
Recreating filestash_app ...
Recreating filestash_app ... done