OIDC setup on Filestash using Azure
This document describe how to setup the OpenID connector of Azure in Filestash. It is split onto 2 parts, the setup and configuration of:
1) the IDP
STEP1: IDP Configuration
Configuring the IDP has a couple steps:
Register an application
Assuming you have already setup Azure AD B2C on your account:
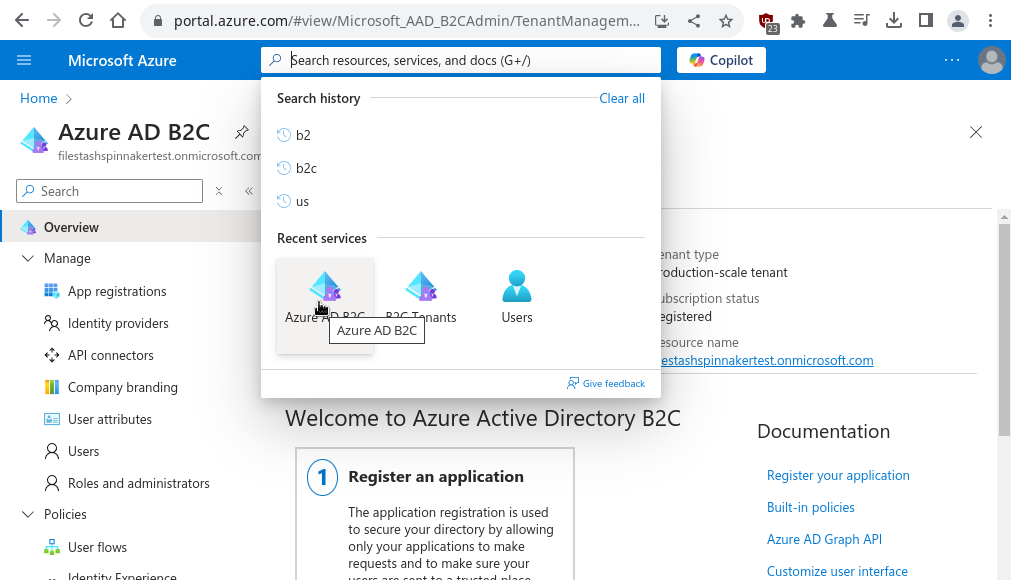
The first step is to register an application:
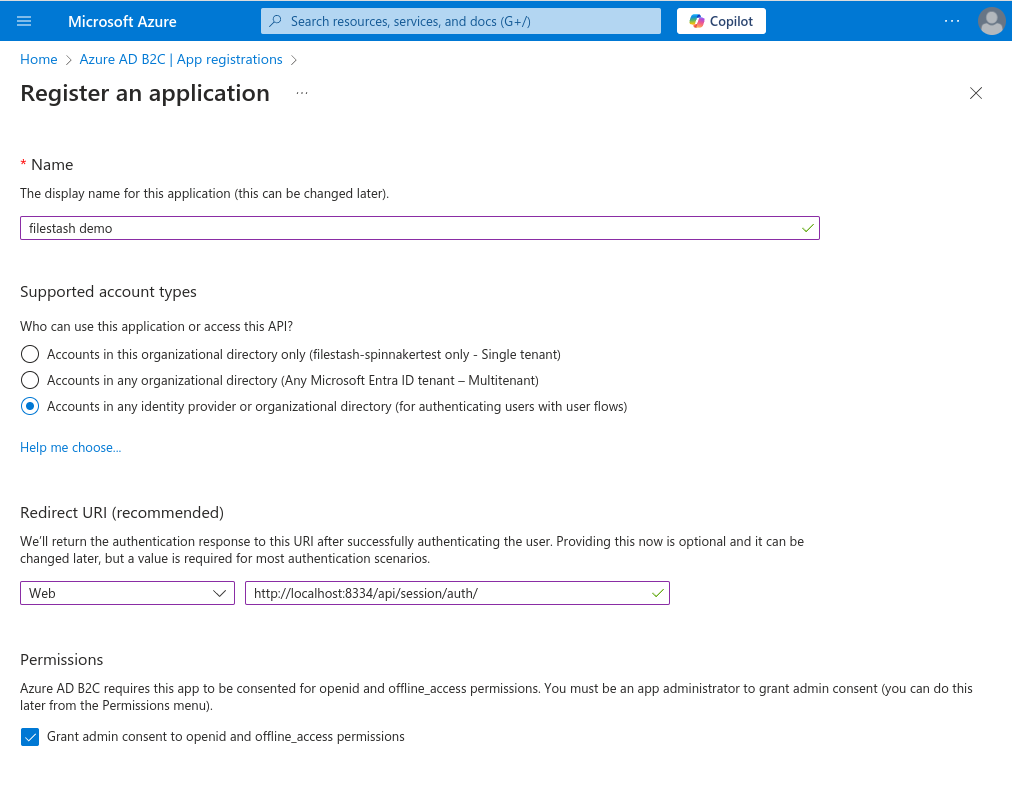
The redirection URI must be on the form of http://your_domain/api/session/auth/.
Policy
Next step is to have a policy setup:
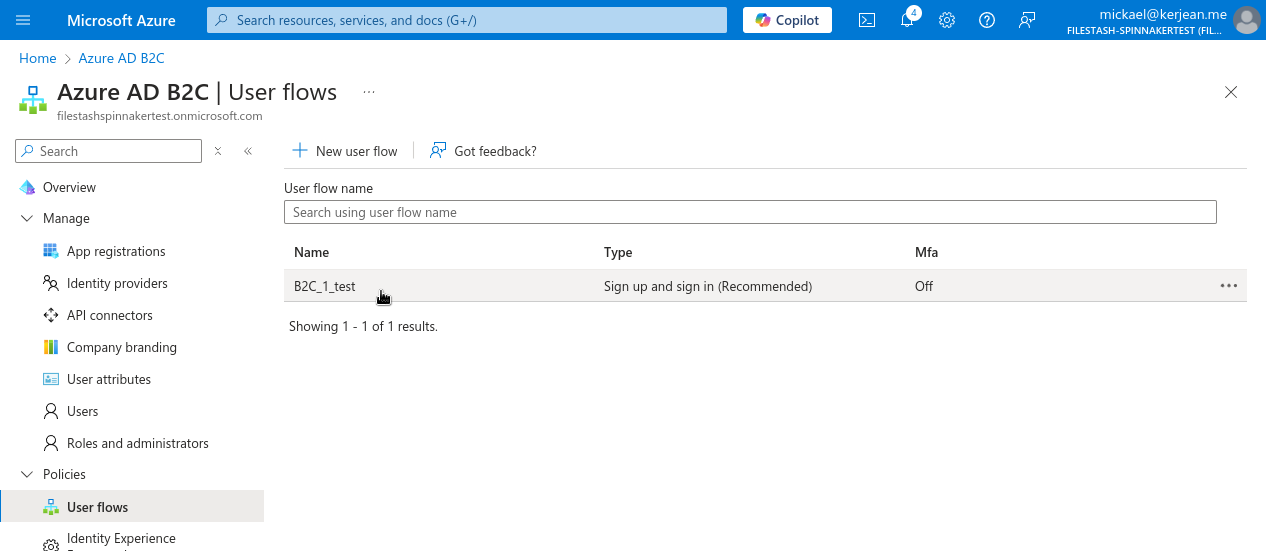
If that’s not the case, create one:
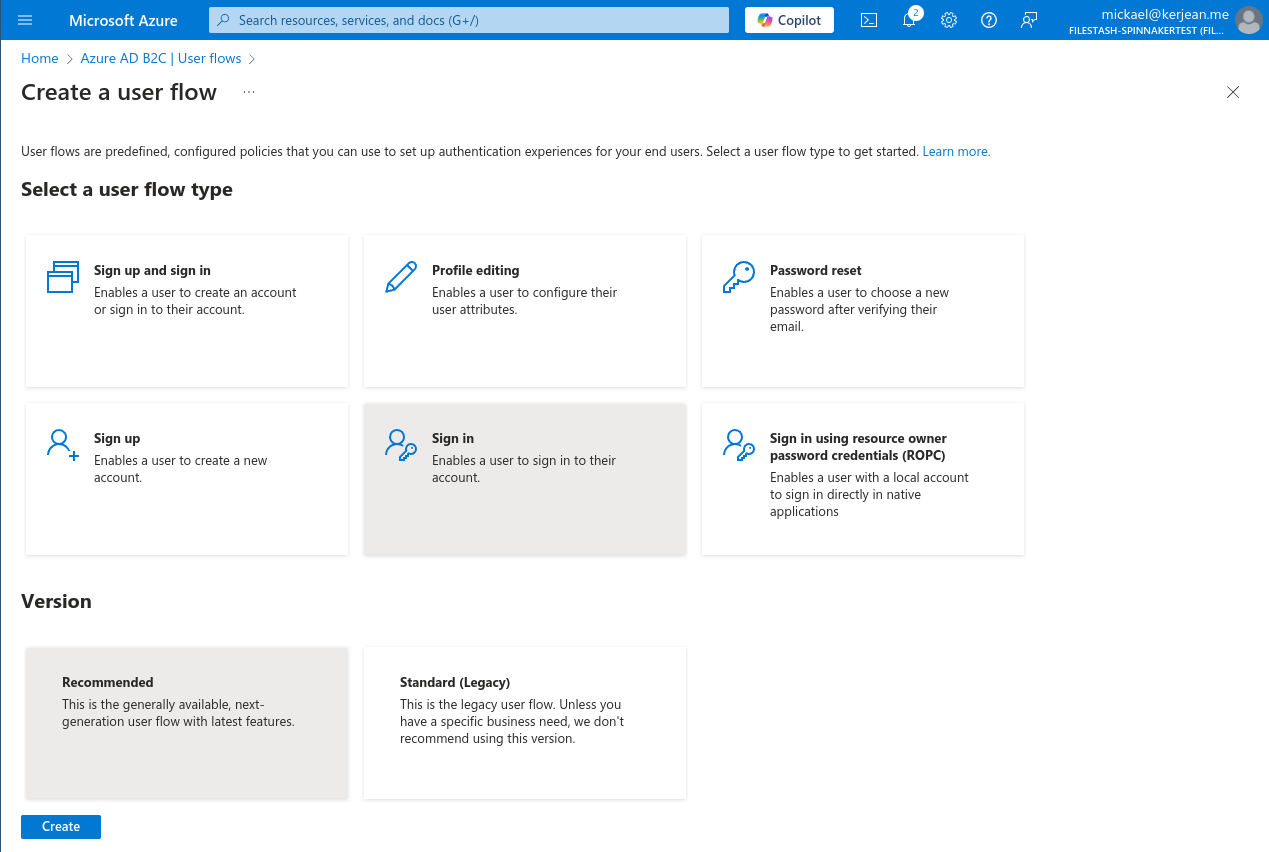
and follow the wizard:
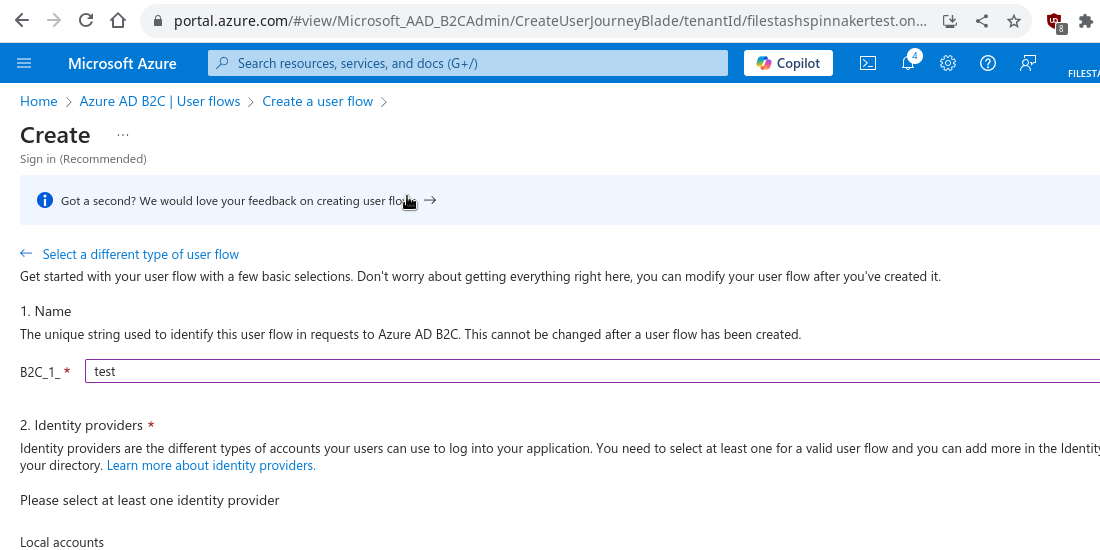
In our scenario the policy name is “B2C_1_test”. Take note of it, we will need it later on when setting up our application.
Get your clientID and client secret
Let’s head to the overview tab of the app registration:
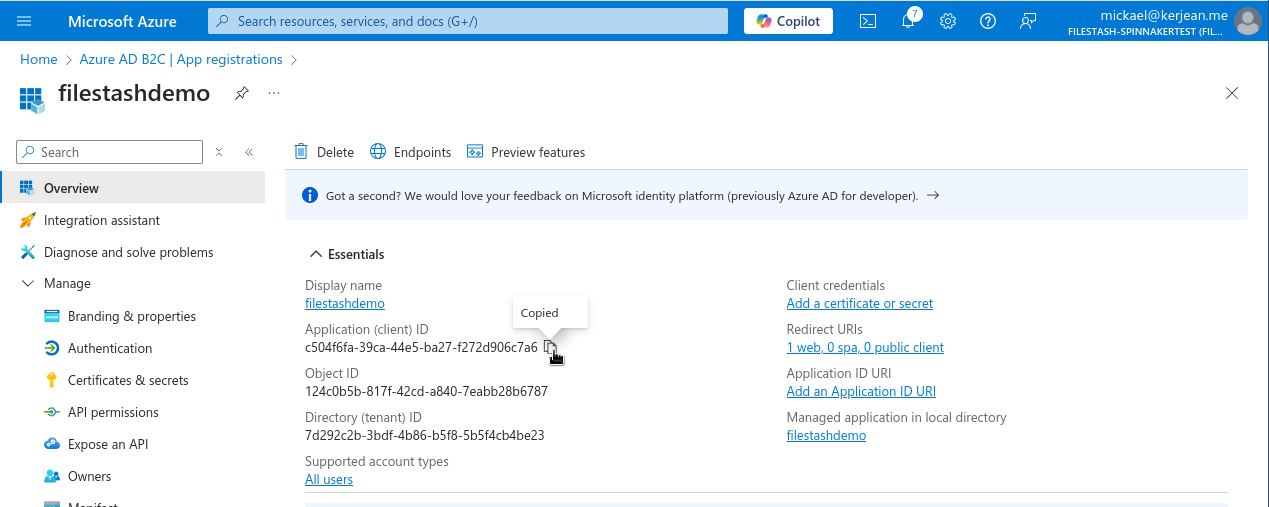
the clientID you will need to configure in Filestash is what’s visible in Azure as “Application (client) ID” which in my case is “c504f6fa-39ca-44e5-ba27-f272d906c7a6”. Take note of it, we will need it later in the setup of the application.
We then need to generate a client secret by blicking on the “Add a certificate or secret” button”, follow the wizard:
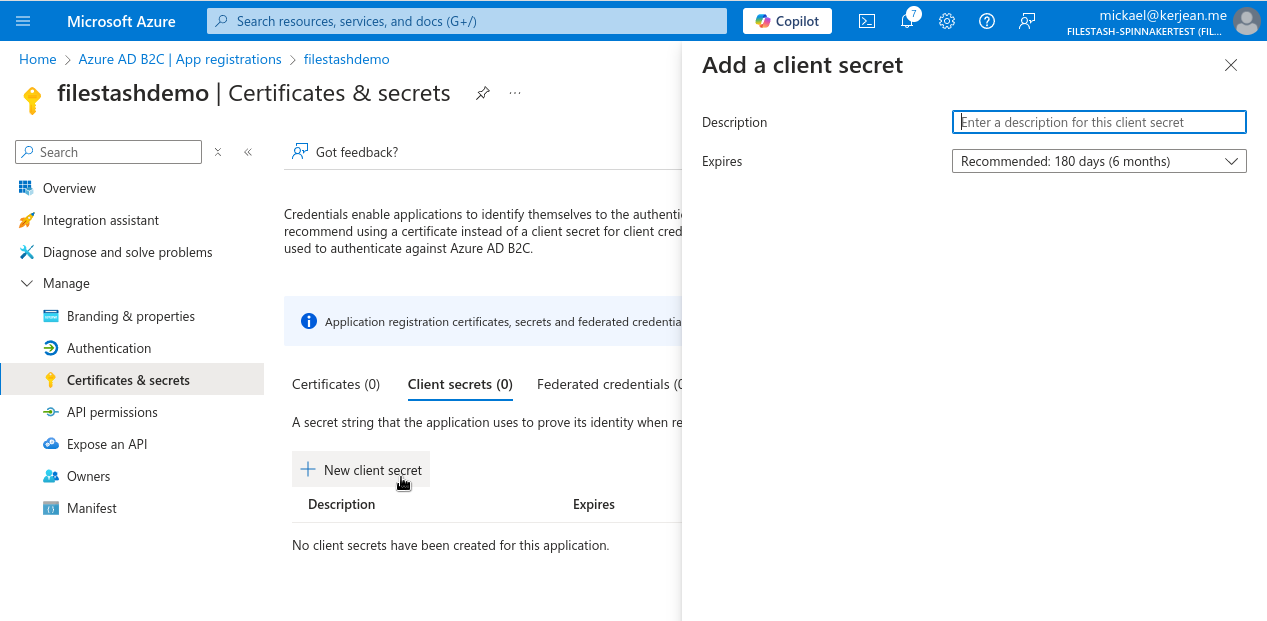
until we can extract the actual secret:
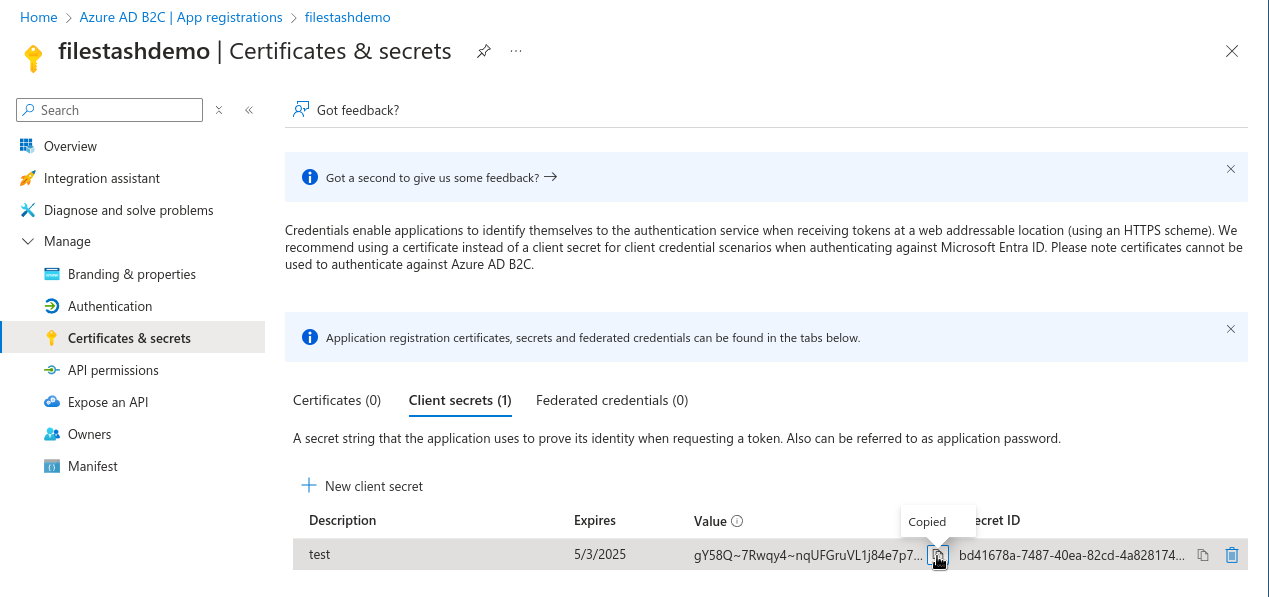
in my case it is: “gY58Q~7Rwqy4~nqUFGruVL1j84e7p7o5z3T81a5O”. Write it down somewhere, we will need it later on.
STEP2: Application configuration
To establish the connection between the app and the Azure IDP, we will need to fill the OIDC authentication middleware in Filestash. A working setup might look like this:
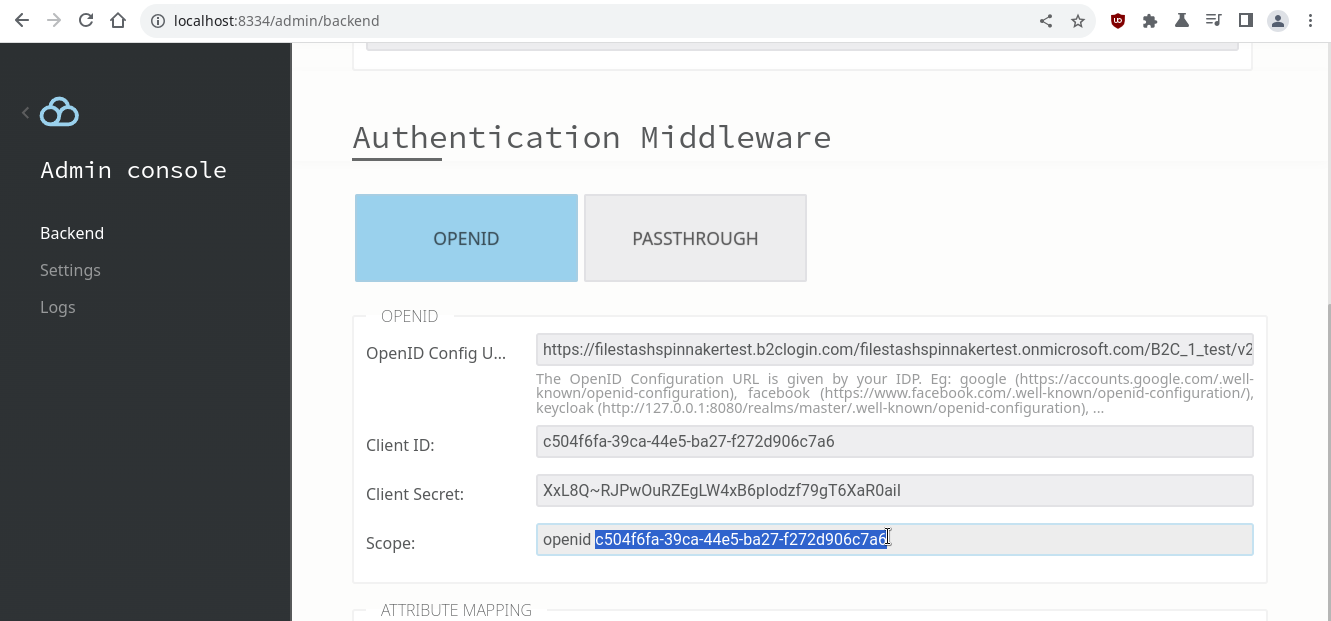
Field1: OpenID Config URL
You can get the value for this field by navigating on the application registration:
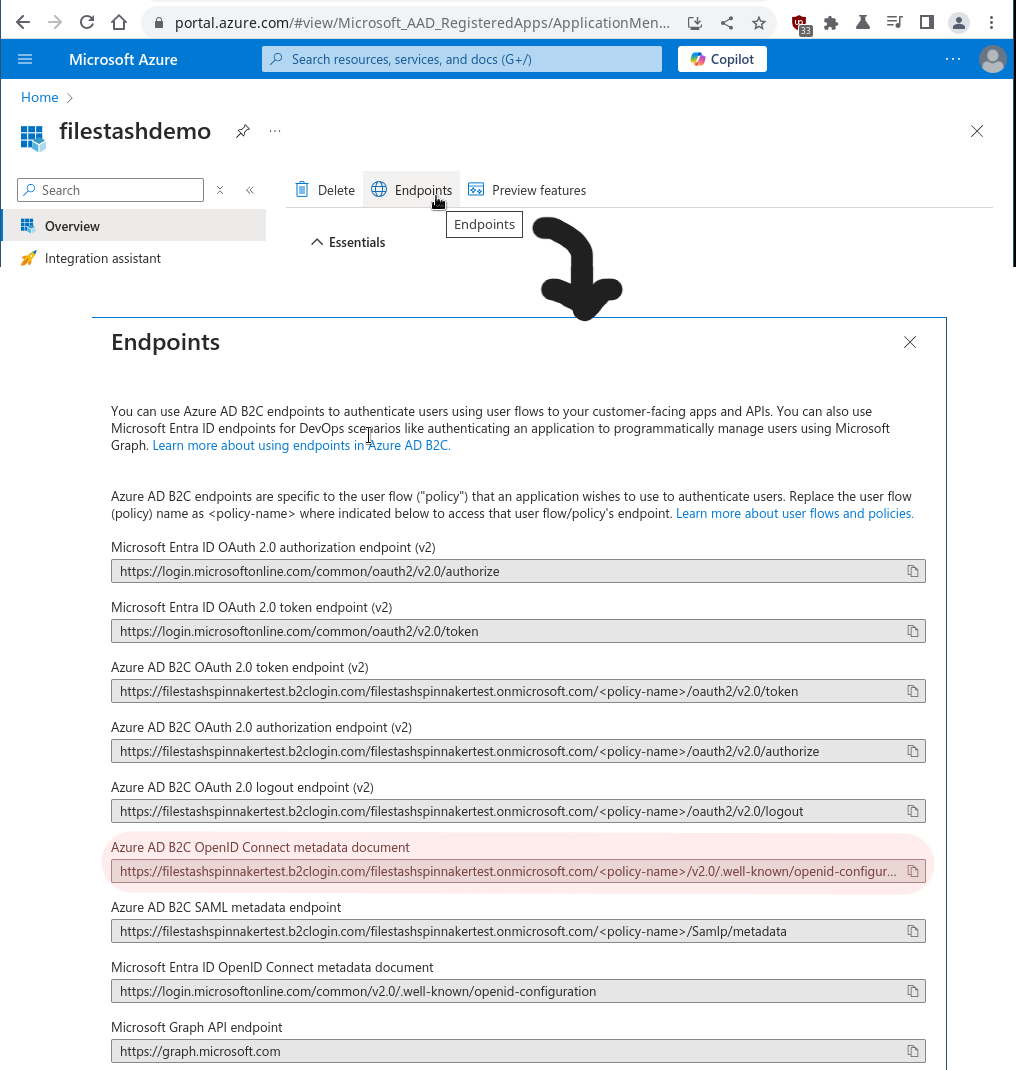
The URL contains a variable for the policy name which should match the relevant User Flows Policy previously made here, in our case “B2C_1_test” making in our case the following openid-configuration link
Field2: Client ID
That’s one of the fields I’ve asked you to write down in STEP1 => Get your clientID and client secret
Field3: Client Secret
That’s one of the fields I’ve asked you to write down in STEP1 => Get your clientID and client secret
Field4: Scope
In its default setup, Azure doesn’t comply with the OIDC spec and doesn’t give an access token in its token response unless you specify in the scope the appID of your application. To get the appID for your application, you need access the app registration manifest:
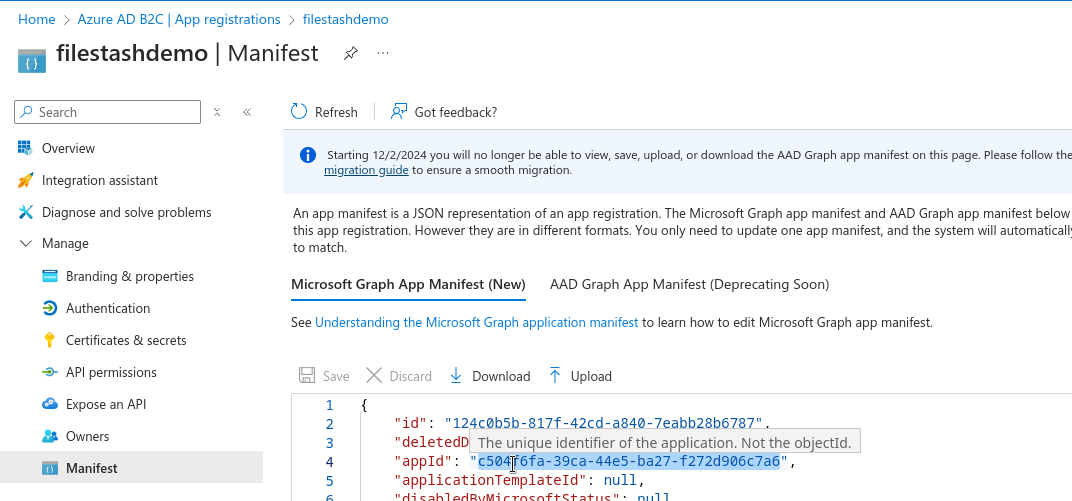
and enter that value back in your scope configuration:

Failing to do so will give you a “Oops! Not Allowed” error message with the following messages in your logs:
2024/11/04 16:13:14 SYST DEBUG session::authMiddleware 'backend connection failed map[timestamp:2024-11-04T16:13:14+11:00] - Not Allowed'
2024/11/04 16:13:14 HTTP 307 GET 1365.3ms /api/session/auth/?code=eyJraWQiOiJjcGltY29yZV8wOTI1MjAxNSIsInZlciI6IjEuMCIsInppcCI6IkRlZmxhdGUiLCJzZXIiOiIxLjAifQ..yoe25AWqup3VONud.HCIy4ACebTUfRyoNwNzCQVWAHn45vzIpNDTZmRr8sOVy8LYryhmEMlrqiz_yVlWfTcVSibImWhbkd1StkwT1xHF_ssYiy8KRWNoaasIzNcZdtbhalXX0JEgA8_RU1vJiflQKEiuDf6H54vlFC4fNpPHqtLiHFcDhnMXjNh2xlzIbSpF3szyGx02D_Eb4R95K_Xqyc6WGeheTfOWjxsQQVX_oiXGp6I1SODj1edCWP3UfTHRh1b1X75Fr_SoVRBztrsdz-5_FeErC5koF8l7hSfU2brKqB0-wCR6Ynb4cMJw3iKwtKOKBvHavp4eAD01x7dRkGhMj8dABdYo6fYKiThlDrLj3ArgCd8RpkB9RqKtBpQy3cwSyIp4MZGibqeWx_sS-il1WieGd5eXCJIH1jFuPaxXJpw0MmBfOKRiK8otK0MX9TunYgwmRPBDGV0dLtQrF3L-tKWqdaORYB6pIhjCN0VwDyFSYEuyZtmbb75d8__4qQgO234D4eRDhYzr6SDgY6mkLZ5Q0V9uZNar47fufLX0cdvxitjA3rljOn4G2rOk.JcBCb9GRQ7nXHnOjkd-Ogw
2024/11/04 16:13:14 HTTP 200 GET    1.3ms /?error=Not%20Allowed&trace=backend%20error%20-%20Not%20Allowed
Another limitation is Azure OIDC don’t provide a user info endpoint to extract user profile information given an access token. The great care of Microsoft torward OIDC is at full display in this report, please talk to your Microsoft representative so they can fix their implementation to follow the specs.
