Guide to Storage in Filestash
This is guide 1 of 3 covering the triptych: storage, authentication, and authorisation, which together form the basis of a good file management platform where you stay in control of “who can do what and where”. This episode covers storage, aka the “where” part.
What constitutes a storage in Filestash?
Before we get into the weeds here, Filestash borrows what we think are good ideas like FUSE and Plan9 to provide an interface that goes beyond Unix and is practical for clients trying to access remote storage, whether via web clients or sync clients, or for exposing it via gateways.
Practically, a storage in Filestash is anything that implements this interface:
type IBackend interface {
	Ls(path string) ([]os.FileInfo, error)
	Stat(path string) (os.FileInfo, error)
	Cat(path string) (io.ReadCloser, error)
	Mkdir(path string) error
	Rm(path string) error
	Mv(from string, to string) error
	Save(path string, file io.Reader) error
	Touch(path string) error
}
So we’ve made drivers covering: FTP, SFTP, WebDAV, SMB, NFS, local filesystem, S3, Azure Blob, Google Cloud Storage, Backblaze, Storj, Dropbox, Google Drive, SharePoint, Syncthing, Resilio, IPFS, Perkeep, GPFS, Artifactory, and even things that would not be considered as traditional filesystems but can be modeled as such, like Git, a WordPress site, LDAP, MySQL, PostgreSQL, CardDAV and CalDAV.
Option 1 of 2: Unconfigured / Bare Storage
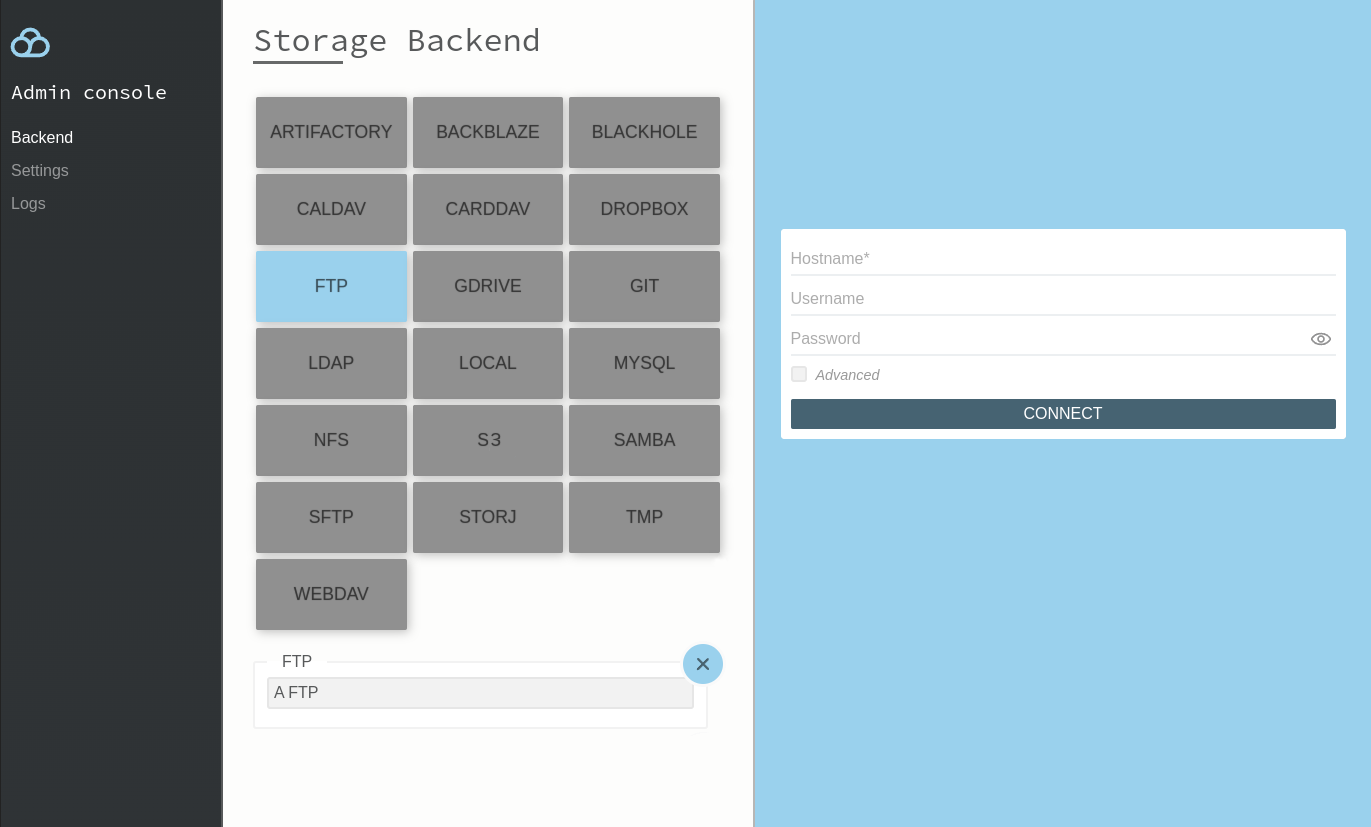
All the storage drivers you have installed are visible to admins from /admin/storage. Pick one and you get a web client that works like FileZilla, WinSCP or Cyberduck: users land on a login page asking for the connection details and you are good to go:
You aren’t limited to one either. Pick as many storages as you like and give each a label: that label is the tab your users will click on from the login page to pick where they want to connect:
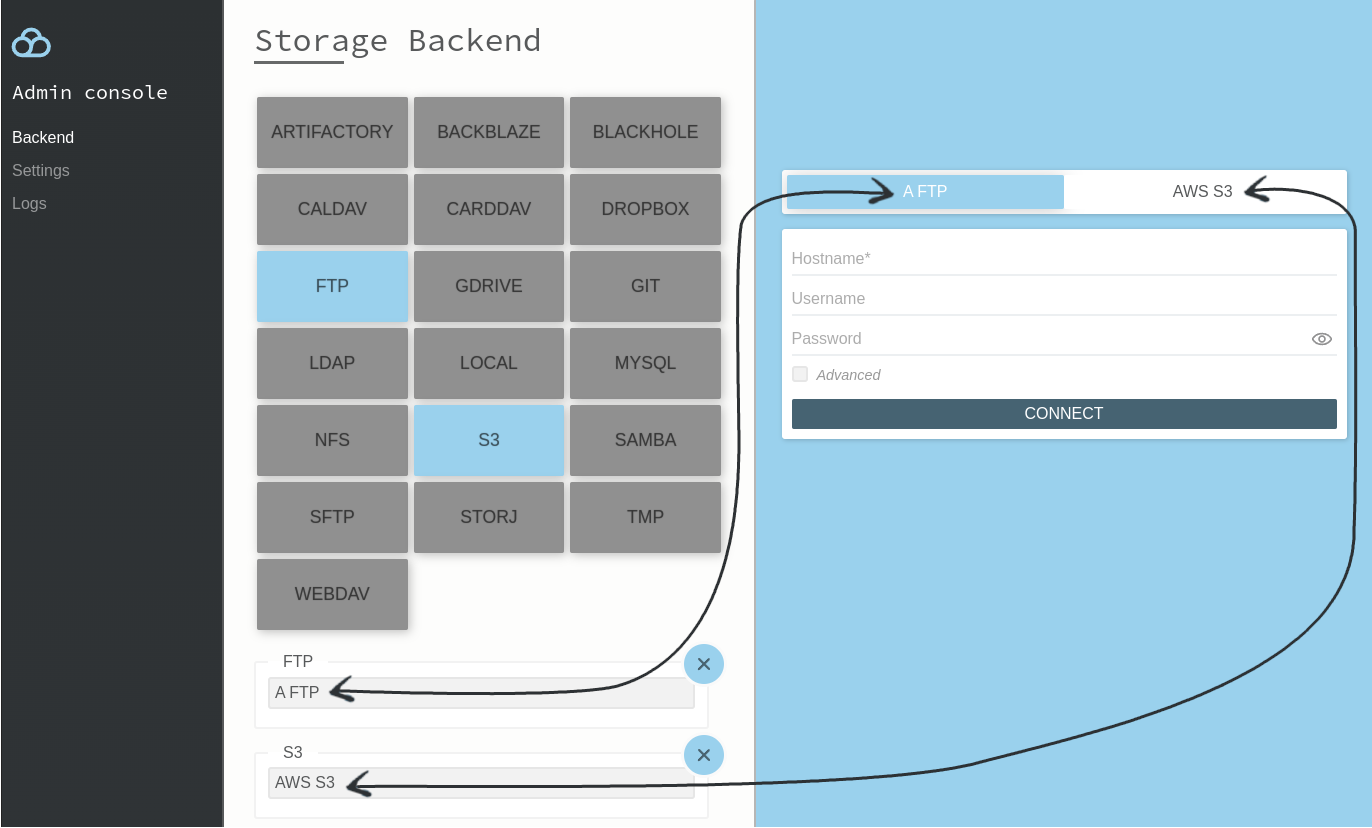
That label is also the foreign key we will be using to create a connection template after filling in the Authentication Middleware section, so users will get connected automatically based on who they are.
Option 2 of 2: Preconfigured Storage
With option 1, users need to know the technical details of the underlying storage: the hostname, the port, an access_key_id, … concepts that are second nature to us technical folks but well outside the comfort zone of non technical users. The authentication middleware removes that burden by compiling the user’s identity into a connection template. Users log in through whatever process you choose for them, never see the underlying connection details, and land exactly where you decide.
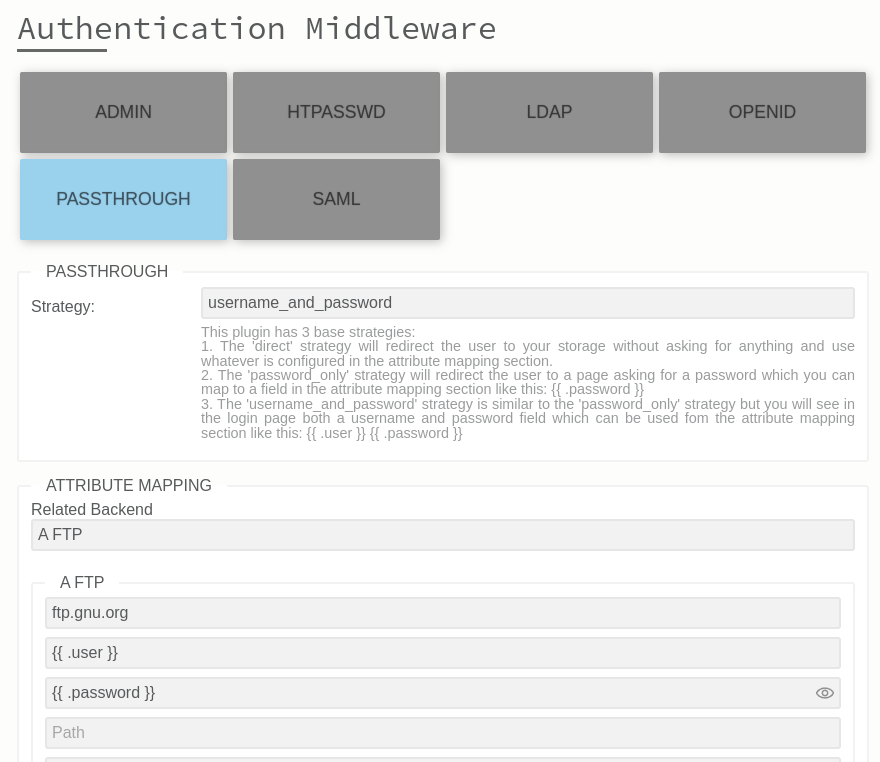
The Attribute Mapping block is where storage and authentication meet. Click on the Related Backend field and pick one of the labels you created in option 1 (that’s the foreign key we mentioned earlier). Once selected, a storage block appears, and whatever you put in there becomes the user’s session data. That session data can be static, so everyone lands on the same thing, or a function of the user’s identity:
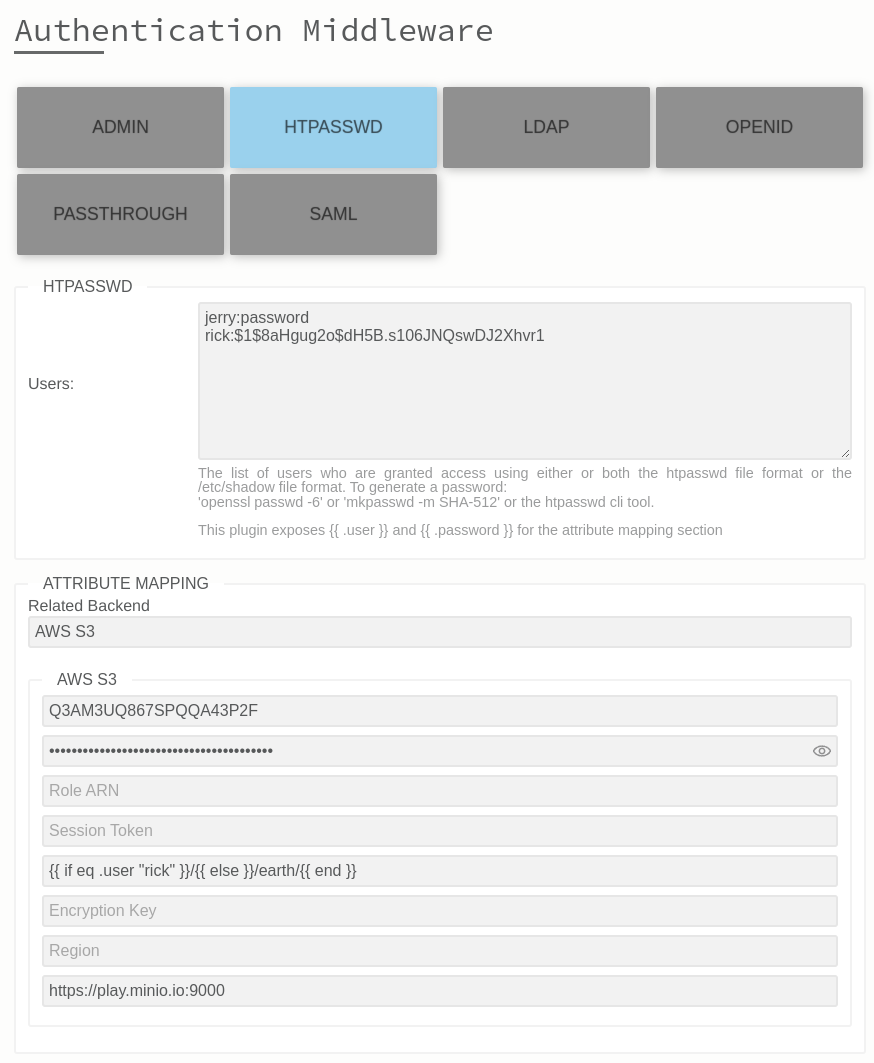
Here, the rule is simple: “rick” has access to every bucket while the rest of us earthlings are stuck in the earth bucket. Any attribute from the user’s identity can be used to shape the connection to your storage, and each attribute can be made into rules through the full power of the Go templating language. Wondering where attributes like .user come from? That’s the job of the authentication plugins, which we cover in the guide on authentication.
Where to find the storage drivers in your build
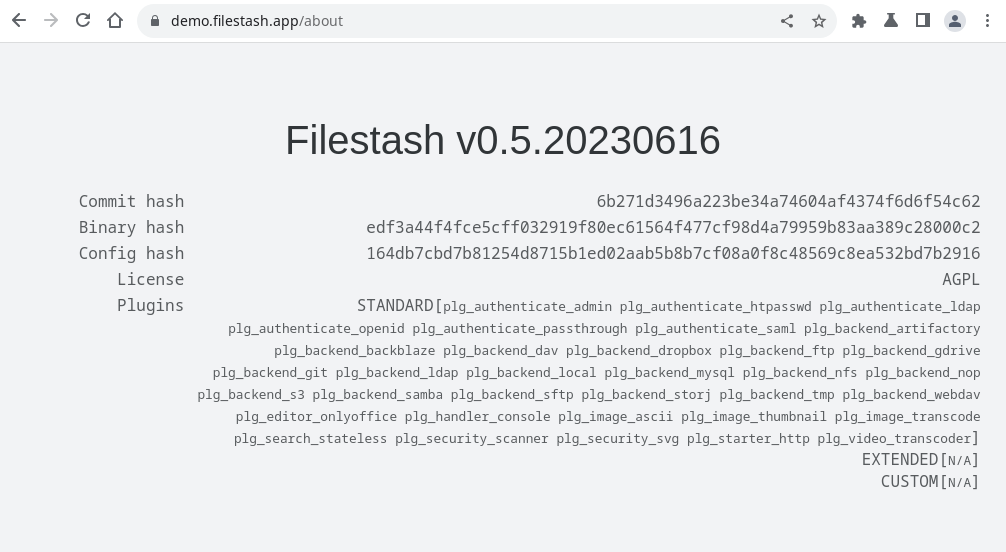
If you want to see what’s available in your build, head to /about and look at everything starting with plg_backend:
Advanced Features
Virtual Filesystem
Playing with storages in isolation is fun and all, but what if we start connecting them together? You could aggregate them into a single logical view of your files, build a view completely disconnected from the reality of your filesystems, or move data between places.
Welcome to the virtual filesystem, by far the most powerful storage we have available. It builds on every storage driver installed in your instance: the gist is that you mount them together through configuration, like this:
/folderA/ {"type": "local", ...}
/folderB/ {"type": "azure", ...}
Or go fully dynamic by applying what we saw in option 2, so the virtual filesystem itself is shaped by who the user is:
{ if .role | eq "dev" }
/projects/ {"type": "local", "path": "/home/{{ .user }}/Documents/"}
/projects/azure/ { "type":"azure", "account_name":"{{ .ENV_AZURE_ACCOUNT_NAME }}","account_key":"{{ .ENV_AZURE_ACCOUNT_KEY}}"}
{ else if .role | eq "marketing" }
...
{ endif }
To dig deeper, head to the guide on the virtual filesystem.
APIs
If you are going to interact with various storages programmatically, the APIs will be useful to you. They’re also what powers the various gateways, sync clients, and other drivers like the Docker volume driver, which you can use like this:
docker plugin install machines/fdrive --alias fdrive
export FILESTASH_SERVER=https://demo.filestash.app
export FILESTASH_TOKEN=uKzArshpw49Pta2tJZmg1mywkHcmimpW4lCjtVDNTbUFpmN0W2PXajSRR_fA5VrRr4Ks1S5SHwn9YffL74qRrVr1jssRUCXp4_uZdItrYUhQegWAGh5xT45-DgHowJb5aFtO-nODOMpFa6Y84Sit7za3GyM1miEpYm0wWgVucCs4tA==
docker compose -f - up <<EOF
services:
  agent:
    image: alpine
    command: ["ls", "-la", "/mnt"]
    volumes:
    - files:/mnt

volumes:
  files:
    driver: fdrive
    driver_opts:
      server: ${FILESTASH_SERVER}
      token: ${FILESTASH_TOKEN}
EOF
What next?
This guide was about 1 of the 3 pillars. Read about the other 2: authentication and authorisation.